Cleaning Brass Ship Lights: 11 Simple Fixes to Avoid Scratches
Cleaning brass ship lights is mostly about controlling two things: abrasion and moisture. Brass is a copper alloy, so it naturally oxidizes and can grow green corrosion in salty air. The trick is to remove grime and active corrosion without grinding away the surface or pushing liquid into sockets and cable entries. This guide covers how to identify lacquered vs bare brass, how to clean and polish each safely, and how to protect the finish so you clean less often.
Why brass ship lights turn dull or green
Brass reacts with oxygen, moisture, and salts. That reaction forms dark tarnish and, in harsher conditions, a green corrosion layer often called verdigris. In marine environments, chloride contamination can make that green layer more aggressive.
Ship lights also get dirty in very normal ways. Fingerprints hold salts and skin oils. Engine room soot embeds in fine scratches. Old polish residue hardens around screw heads and bezels.
Safety first: treat every ship light like it can bite
If your brass light is wired, treat it as electrical equipment before it is a decorative object.
- Isolate power at the breaker and confirm it is dead.
- Let the fixture cool fully if it was recently on.
- Keep liquids away from lampholders, cable glands, and junction areas.
- Wear nitrile gloves and eye protection if you will use any chemical cleaner.
- Ventilation matters if you use solvent-based polish.
UL’s general guidance for cleaning electrical equipment emphasizes de-energizing where possible and using appropriate PPE.
Identify what you are actually cleaning
A brass ship light can be one of these:
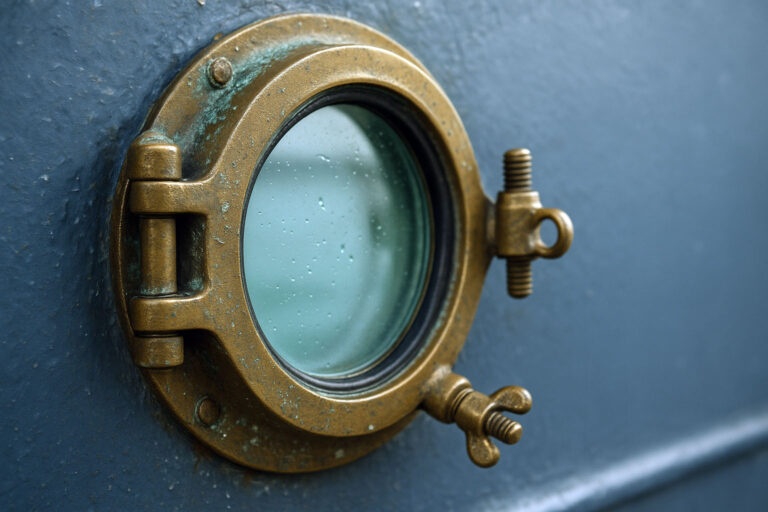
Lacquered brass: A clear coat sits on top. The surface often looks glossy and even.
Bare brass: No clear coat. It oxidizes and darkens faster.
Plated finish: Brass-colored plating over another metal. It scratches through quickly.
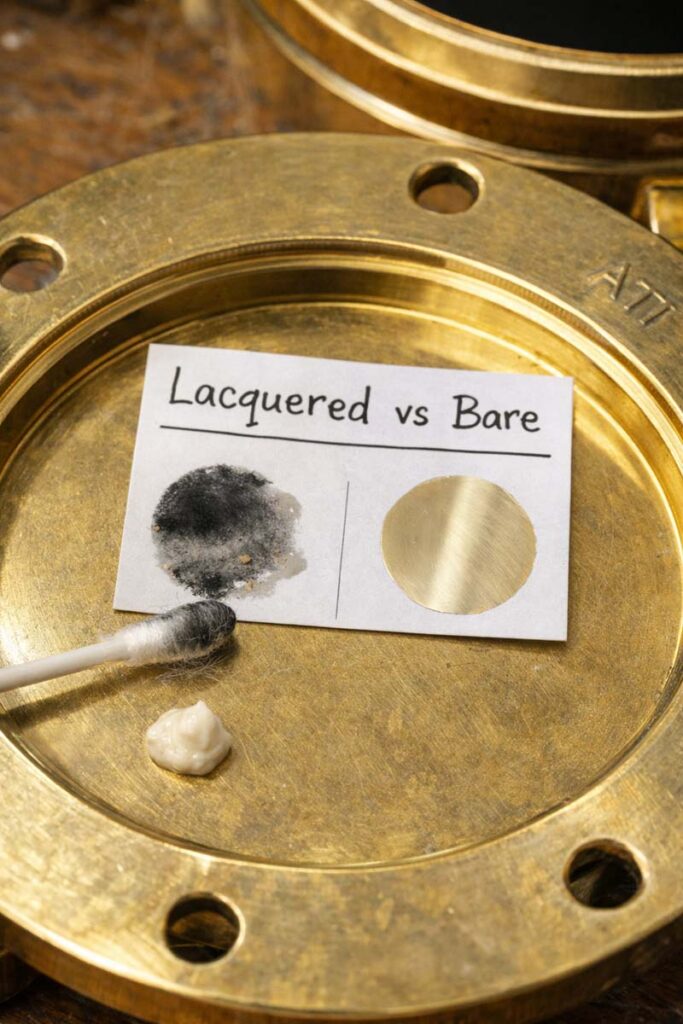
A simple test helps. Choose a hidden spot inside the back flange.
- Wipe with warm water and a drop of mild dish soap. If it improves, it is mostly grime.
- If it still looks cloudy, dab a tiny amount of metal polish on a cotton swab.
- If the swab turns black quickly, you are likely on bare brass.
- If nothing changes and the surface looks like a clear film, it may be lacquered. In that case, stop polishing.
As a general rule, lacquered brass should be cleaned with mild soap and soft cloths, not abrasive metal polishes, because you can damage the coating.
Tools and materials that work without creating new damage
Use what matches the condition. You do not need everything.
- Microfiber cloths (separate cloths for washing, drying, buffing)
- Soft toothbrush or small detailing brush
- Mild dish soap
- Distilled water (best for final wipe in hard-water areas)
- Cotton swabs for corners
- Wooden toothpicks for tight creases (safer than metal picks)
- Non-abrasive metal polish for bare brass only
- Isopropyl alcohol for final wipe on bare metal only (keep away from lacquer)
- Microcrystalline wax or a marine-grade protective wax
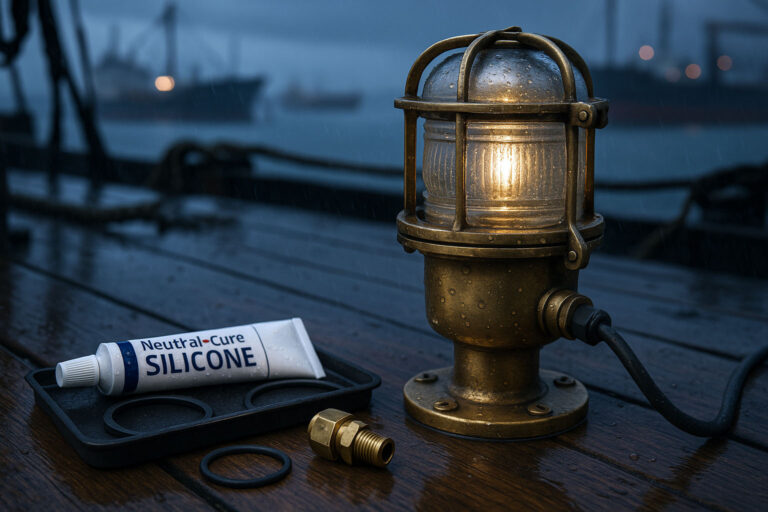
- Silicone grease for gaskets (only a thin film)
Avoid steel wool. Avoid aggressive scouring pads. Those scratches hold salt and make the next round of corrosion faster.
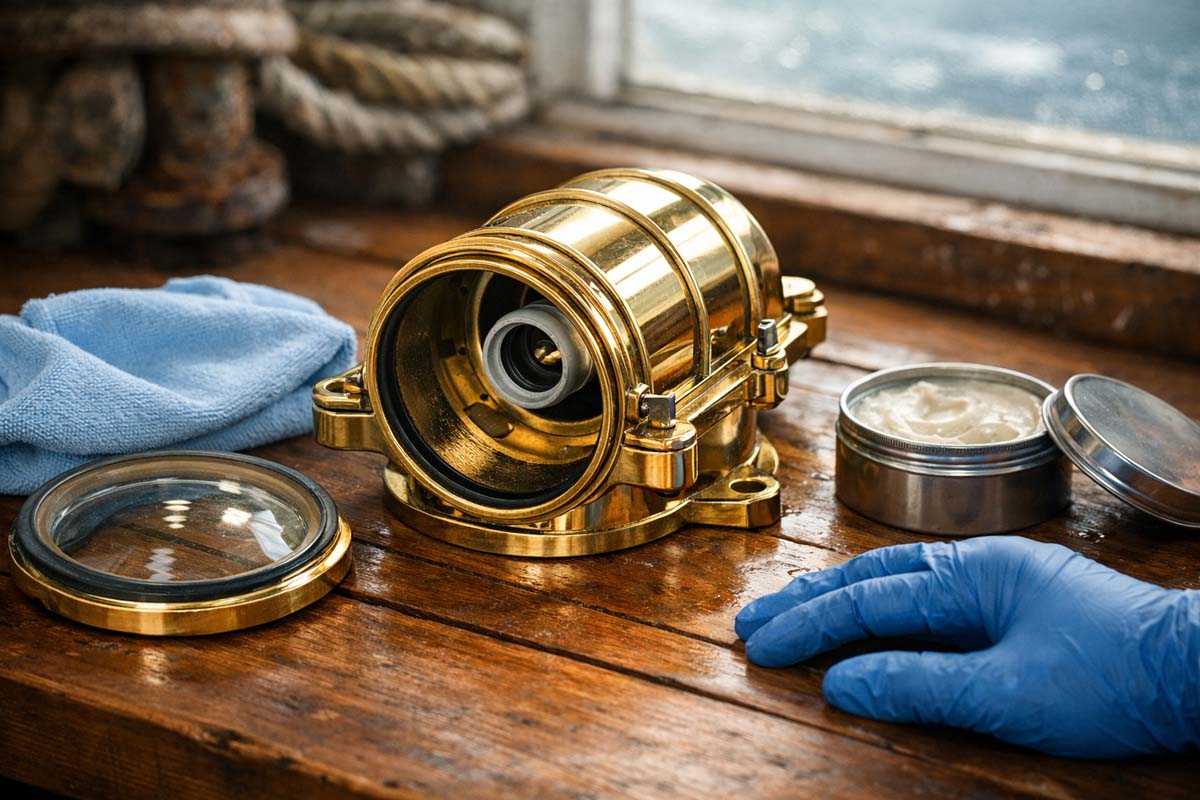
Step-by-step: cleaning brass ship lights the safe way

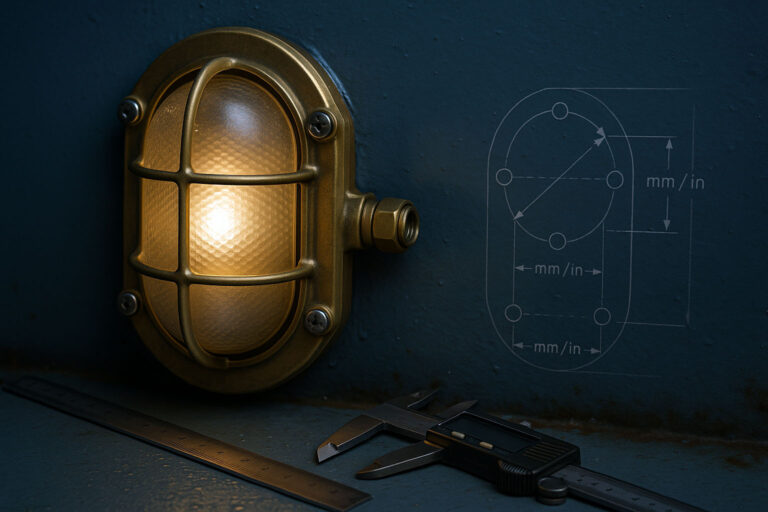
1) Disassemble with control
- Photograph the light from all angles before you touch anything.
- Remove the lens guard, bezel, and lens carefully.
- Bag small screws and label them. Many ship lights use mixed fasteners from past repairs.
If fasteners fight you, do not force them. Penetrating oil on the screw threads is fine, but keep it off the lens gasket.
2) Wash away grime before you polish
- Mix warm water with a few drops of dish soap.
- Wipe the brass with a damp cloth, not dripping.
- Use a soft brush around knurling, casting marks, and nameplates.
- Rinse by wiping with a clean damp cloth.
- Dry immediately with a separate cloth.
This one step often restores 60% of the look because dirt is what makes brass appear “dead.”
3) Remove green corrosion without gouging the metal
If you see green deposits:
- Start dry. Use a soft toothbrush to lift loose powder.
- Use a damp cotton swab with soapy water for stubborn spots.
- If it still holds, move to a gentle acidic cleaner only on bare brass, and only locally.
A practical workshop option is a weak citric-acid solution. It chelates corrosion products and rinses clean. Keep it away from wiring, steel parts, and lacquered finishes.
After any acidic step, neutralize by wiping with clean water, then dry fully. Leaving acid residue is how you get patchy re-tarnish.
4) Polish only if it is bare brass and you want a bright finish
Polish is controlled abrasion. Use it like sandpaper, not like soap.
- Apply a pea-sized amount of metal polish to a soft cloth.
- Work small zones. Light pressure. Short passes.
- Use cotton swabs around stampings and screw bosses.
- Buff off residue with a clean cloth until it feels slick, not greasy.
If you want an aged patina, skip polishing. Just clean and protect. Patina is not dirt. Patina is the metal’s stable surface layer.
5) Clean the lens and reflector correctly
Glass lenses clean best with mild soap and water, then a lint-free dry. If your lens is Fresnel-patterned, use a soft brush to pull dirt out of grooves.
If there is a reflector, treat it gently. Many reflectors are plated or aluminized and scratch easily. Use only a damp microfiber cloth and stop when the dirt lifts.
6) Inspect and re-seal before reassembly
Look for problems that cleaning reveals:
- Cracked lens
- Flattened or brittle gasket
- Green corrosion around cable entry
- Loose lampholder
- Burn marks or heat damage
Reassemble dry. Add only a thin film of silicone grease to the gasket if needed, and keep grease off the visible brass.
One chemical warning many people miss: ammonia and brass
Some household cleaners contain ammonia. Ammonia exposure can contribute to stress-corrosion cracking in brass under certain conditions, a phenomenon often called “season cracking.” In practical terms, it is one more reason to avoid ammonia-based sprays on old brass parts with stress, bends, or threaded sections.
Protecting brass so you clean less often
Brass stays brighter when you block oxygen, moisture, and fingerprints.
For bare brass (after cleaning):
A thin layer of microcrystalline wax is a solid choice. It forms a moisture-resistant barrier and is easy to renew.
For lacquered brass:
Do not wax unless you are sure the coating is intact and compatible. Usually, a clean, dry microfiber buff is enough.
For working marine environments:
Plan on maintenance, not perfection. Salt air wins if you leave bare metal exposed.
Copper-alloy performance depends strongly on environment, especially seawater exposure and contamination.
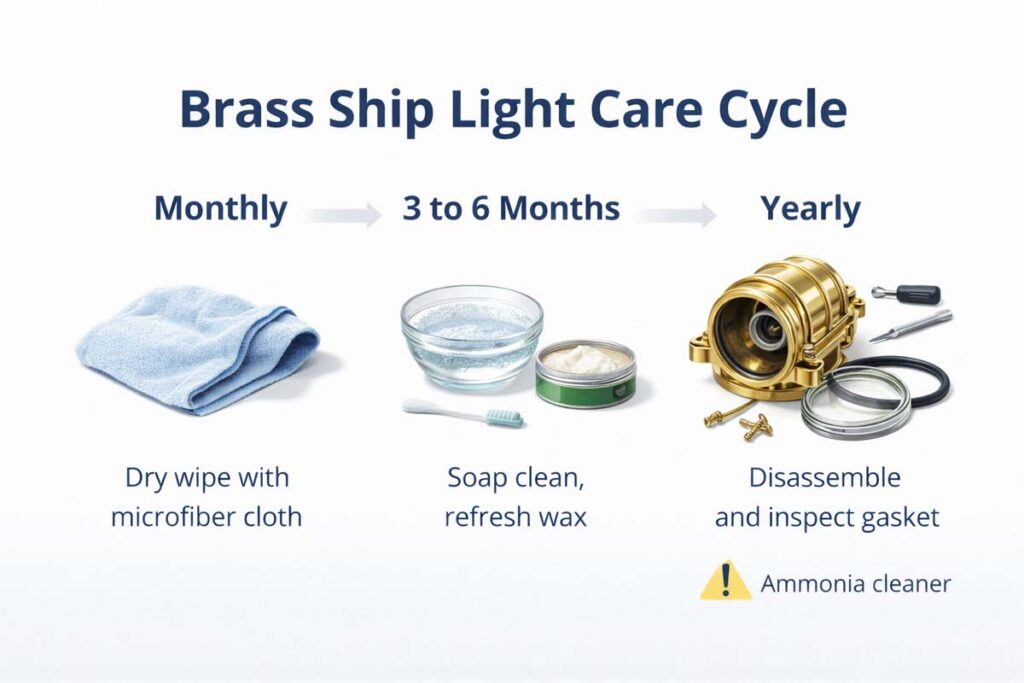
Maintenance rhythm that works in real life
If the light is installed outdoors or near the coast, a light routine beats deep polishing.
- Monthly: wipe with a dry microfiber cloth to remove salt film and fingerprints.
- Every 3 to 6 months: mild soap wipe, dry fully, refresh wax on bare brass.
- Once a year: disassemble, inspect gaskets, check fasteners, and clean the lens grooves.
Common mistakes that ruin brass ship lights
People usually damage ship lights in predictable ways.
- Polishing lacquered brass until it looks blotchy
- Using abrasive pads that leave circular scratches
- Letting water run into lampholders and cable glands
- Leaving polish residue packed in corners (it hardens and looks worse later)
- Using strong acids that undercut edges and turn the brass pink
When it is smarter to repair than to clean
Stop cleaning and plan a repair if you see these:
- Loose or corroded lampholder contacts
- Cracked lens or missing gasket sealing
- Corrosion at wiring entry points
- Threads that feel crunchy or stripped
At Marine Salvage & Antiques Enterprise (operating since 2011, sourcing from Bangladesh ship breaking yards), we see many lights that only needed careful cleaning, plus a gasket refresh and a safe socket upgrade. A small electrical fix often does more than another round of polishing.
FAQs about Cleaning Brass Ship Lights
Can I use vinegar and salt on brass ship lights?
It can work on bare brass, but it is easy to overdo. Vinegar is acid, salt adds chloride, and that combination can create fast, uneven reactions if you do not rinse and dry perfectly. Use it only as a spot treatment, then neutralize and dry.
Should I make brass ship lights mirror-bright?
Only if that matches your space. A bright polish looks sharp, but it removes material. For antique fixtures, a clean, stable patina often looks more honest and requires less maintenance.
How do I know if my brass light is plated?
Look at edges, screw heads, and high points. If you see a different base metal color peeking through, treat it as plated and avoid polishing. Clean gently only.
What is the safest way to remove green verdigris?
Start dry, then mild soap. If it persists and the brass is bare, use a weak citric-acid solution locally, rinse, and dry fully. Avoid soaking assembled parts.
Can I spray clear coat after polishing?
You can, but preparation must be perfect and the product must suit metal and heat. Many clear coats fail in marine humidity. Wax is usually easier to maintain and easier to reverse.
Closing thought
Clean brass ship lights like you would service a winch. Go gentle first, control moisture, and protect what you just restored. If you keep the gasket sealing and wiring areas dry and sound, the light will stay reliable, and the brass will age in a way that looks natural instead of neglected.