Bulkhead Light Sizes & Backplate Patterns (mm/in) with Mounting Tips
Bulkhead lights are the tough, caged fixtures you see on ships and industrial sites. They look simple, but the sizes and backplate hole patterns vary a lot, especially with older salvage pieces. If you pick the wrong size or misread the bolt spacing, you’ll fight the wall and crack a lens. This guide keeps it simple: what the common sizes are in millimeters and inches, how to measure correctly, which backplate patterns actually exist, and proven mounting tips for brick, wood, and metal. Read it once and you’ll install faster, seal better, and avoid the usual rookie mistakes—for good.
What’s a Bulkhead Light?
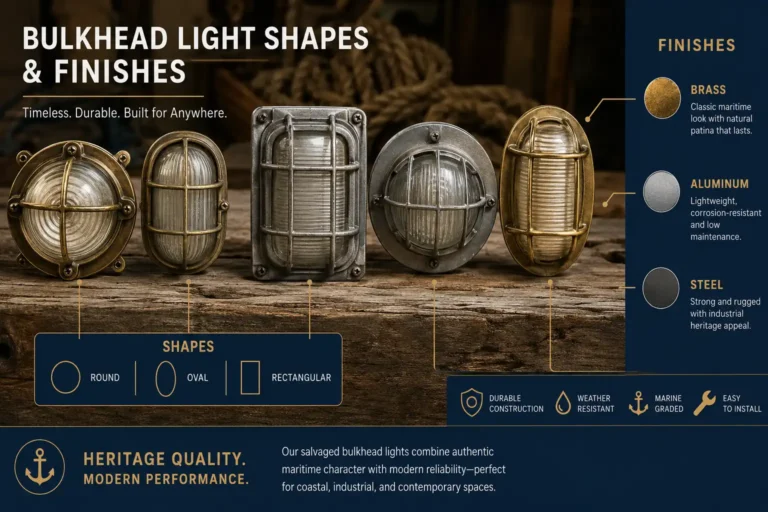
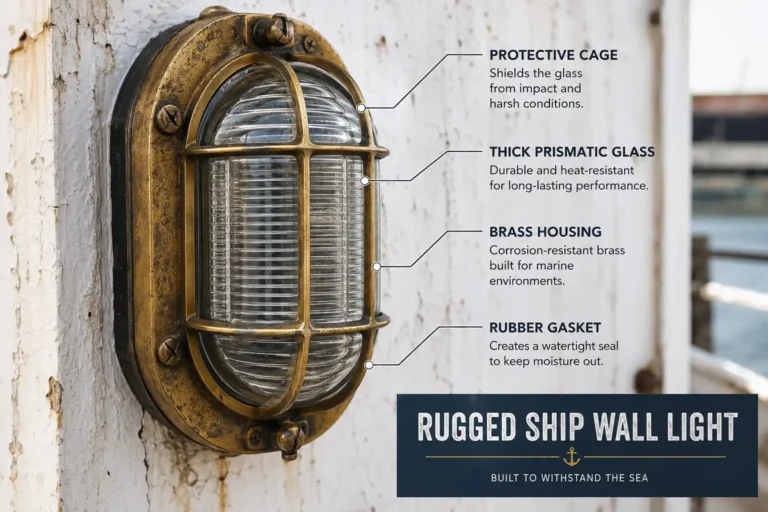
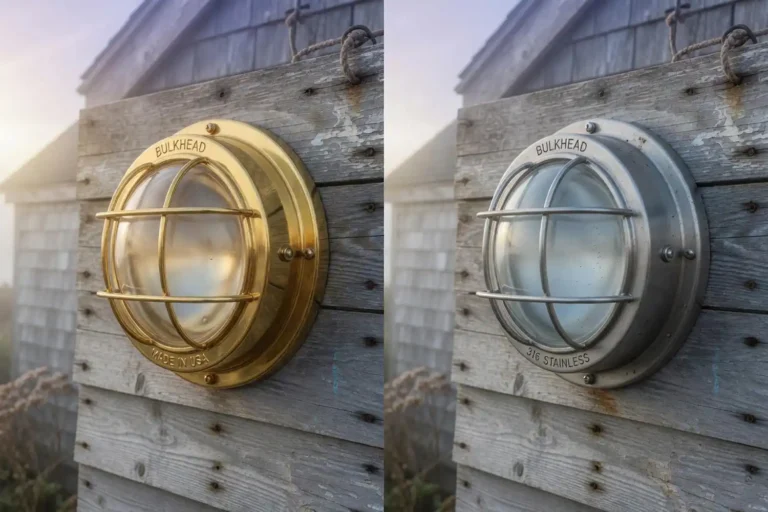
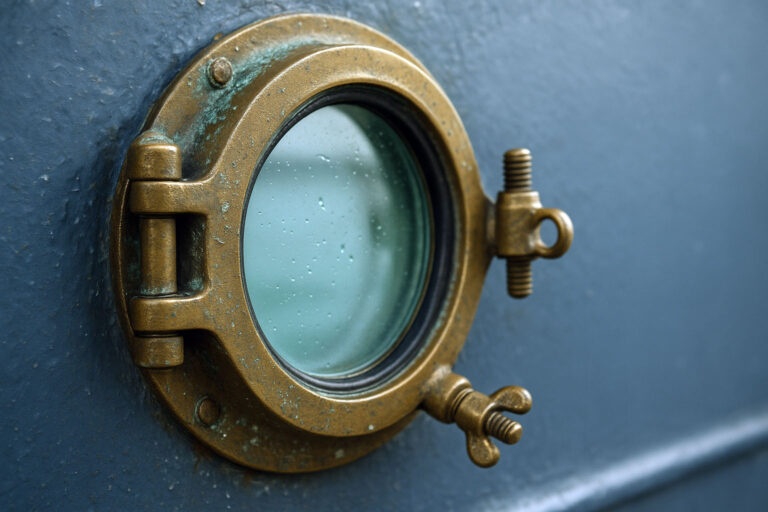
Short version: a bulkhead light is a rugged, sealed wall or ceiling fixture with a protective cage and thick glass. It was designed for ship decks, passageways, and engine rooms, so it shrugs off spray, vibration, and knocks. Shapes are usually oval or round. Materials are brass, bronze, or cast aluminum. Most have a backplate with pre-drilled holes that fasten to the surface, plus a body that opens to change the lamp. Modern LED guts fit easily inside most vintage housings.
Why Sizes and Backplates Matter
Two reasons: fit and sealing. If the body size doesn’t match your space, you’ll either crowd a doorway or under-light the area. If the backplate pattern doesn’t match your anchors, the gasket won’t compress evenly and water sneaks in. On older fixtures, hole spacing was never perfectly standardized. Shipyards drilled to suit the job. That means a “9 inch” oval from Maker A may not line up with a “9 inch” from Maker B. Measure before you drill, convert mm to inches (÷25.4), and use slotted plates when possible.
Standard Body Sizes (quick guide)
Here’s the quick cheat for body sizes you’ll see most often:
- Small oval: 180–200 mm long (7.1–7.9 in), 115–130 mm wide (4.5–5.1 in).
- Medium oval: 220–240 mm (8.7–9.4 in), 135–155 mm (5.3–6.1 in).
- Large oval: 280–320 mm (11.0–12.6 in), 170–200 mm (6.7–7.9 in).
- Round compact: 150–170 mm diameter (5.9–6.7 in).
- Round large: 200–250 mm (7.9–9.8 in).
Depth varies from 80–130 mm (3.1–5.1 in) depending on cage style. These are ranges, not promises. Salvage lights from naval yards and tankers wander a bit. If you’re tight on clearance—like beside a door swing—mock it with cardboard first.
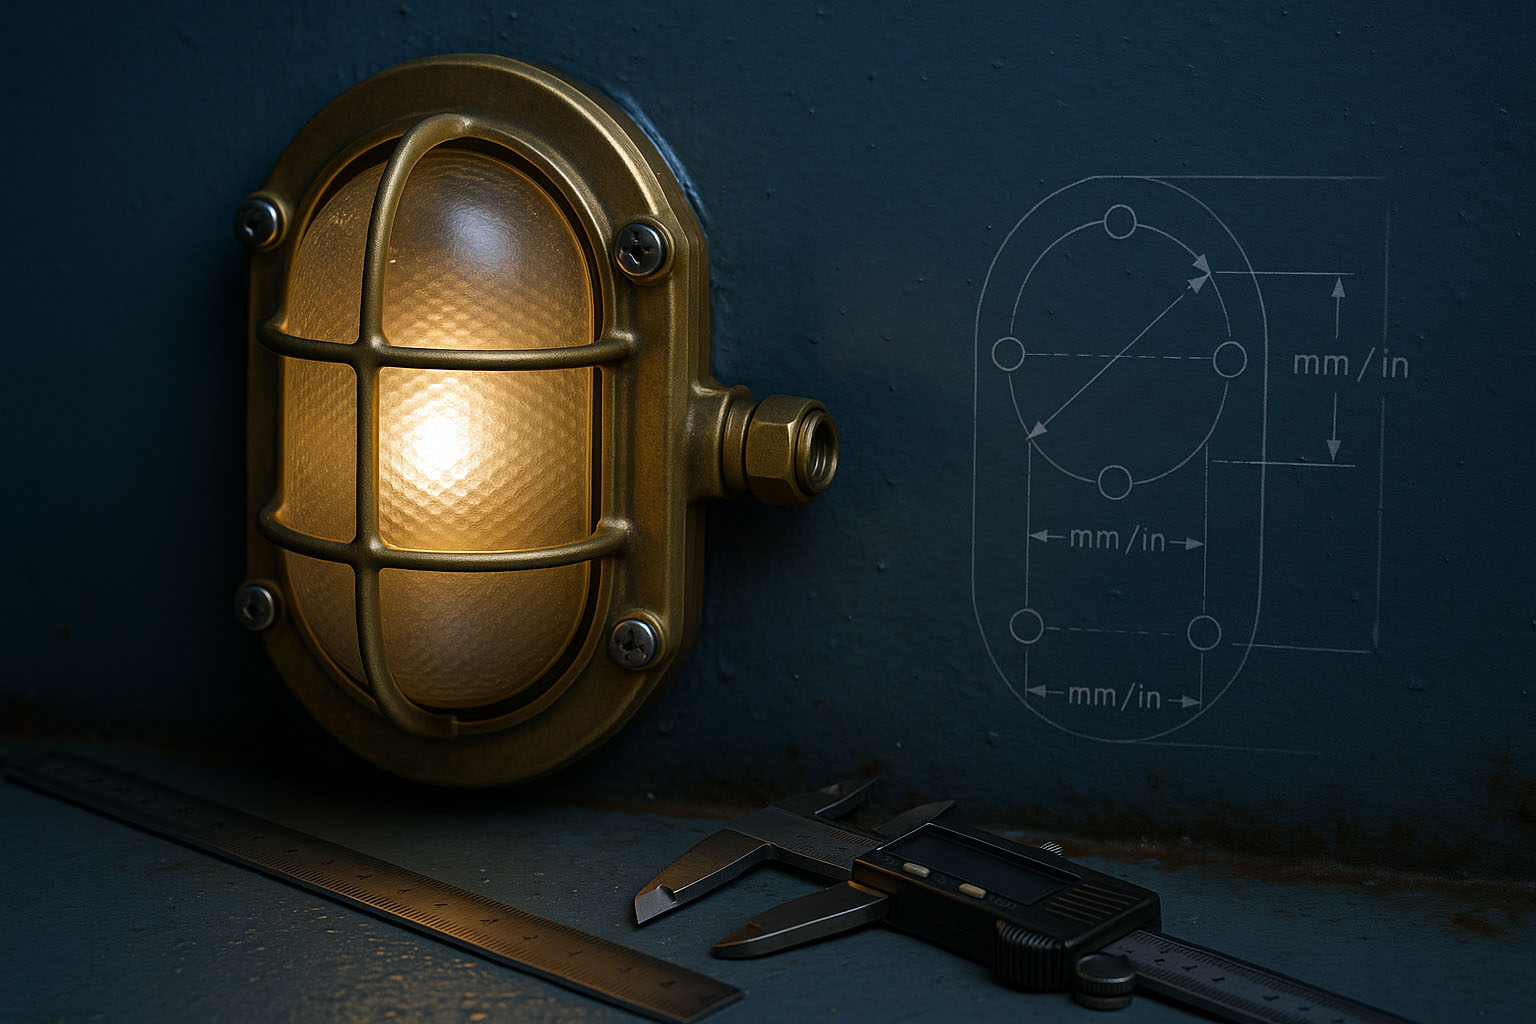
Backplate & Hole Patterns 101
Backplates are the flat part that kisses the wall. Patterns are just the hole layout on that plate. Most vintage bulkheads use either three holes on a circle (triangular layout) or four holes in a square/diamond. The circle size is called the PCD—pitch circle diameter. Hole diameters typically run 5–10 mm (3/16–3/8 in). The goal is simple: center the light, compress the gasket evenly, and keep water out. If your surface is uneven, add a thin EPDM backing pad to create even compression.
Common Backplate Patterns (mm/in) — cheat sheet
These aren’t official standards—just patterns you’ll actually see in the wild. Measure yours to confirm.
- 3-hole round, 95–105 mm PCD (3.7–4.1 in), holes Ø6–7 mm (1/4 in): common on compact round bulkheads.
- 3-hole round, 120 mm PCD (4.7 in), holes Ø7–8 mm: medium ovals and rounds.
- 4-hole square, 84 × 84 mm centers (3.3 × 3.3 in), holes Ø6–7 mm: small/medium ovals.
- 4-hole square, 100 × 100 mm (3.9 × 3.9 in), holes Ø7–8 mm: medium/large ovals.
- 4-hole square, 120 × 120 mm (4.7 × 4.7 in), holes Ø8–10 mm: large ovals and rounds.
- 3–4 holes on slotted ring, 110–130 mm PCD: handy mismatch fixer; expect ±5 mm adjustment.
How to Measure Your Fixture (step-by-step)
Grab a ruler or calipers, a notepad, and your phone camera.
- Body length/diameter: measure outside edge to outside edge in mm, then note inches (÷25.4).
- Backplate: find the center. For 3-hole, measure center to any hole and double it for PCD. For 4-hole square, measure center-to-center across.
- Hole diameter: measure the hole or the screw that came out. Common screws: M5, M6, #10, 1/4-20.
- Gasket: check if there’s a rubber ring; measure thickness and width.
- Cable entry: note thread (often M16 or M20) and the cable’s outer diameter.
- Photos: shoot the backplate straight on with a tape in frame. Photos save rework.
Mounting Tips by Surface
Brick or concrete
- Mark the pattern using a paper template or masking tape. Level it.
- Drill with a 6–8 mm masonry bit for plastic anchors, or 8–10 mm for sleeves.
- Bed the backplate on a thin bead of neutral-cure silicone or a 2–3 mm EPDM pad.
- Use stainless M5/M6 screws with plastic or brass anchors.
Wood siding or beams
- Pre-drill pilots for #10 or #12 exterior screws; add finish washers if the wood is soft.
- Seal the backside with butyl or silicone, especially on vertical clapboard.
- If the board isn’t flat, shim with a gasket so the cage doesn’t twist.
Metal or fiberglass (GRP)
- Use rivet nuts (M5 or M6) or machine screws into existing threaded holes.
- Isolate dissimilar metals with a rubber pad and a dab of anti-seize.
- On thin skins, spread the load with a backing plate if you can reach.
- For watertight installs, use a cable gland and a drip loop, then spray-test.
Wiring & IP Basics
Most vintage housings handle 110–120V or 220–240V just fine once rewired. Use E26/E27 or GU10 lamp holders rated for heat, and bond the earth/ground to the body. As for weather, many bulkheads are roughly IP54 to IP66 when the gasket is intact and the screws are snug. Don’t claim a rating unless you’ve tested it. The real trick is keeping the cable gland matched to the cable OD—too small leaks, too big slips. Test for condensation after first run. Label your wires plainly at the termination.
Fasteners & Corrosion
Outdoor? Go stainless A2/A4 or silicon-bronze. Brass screws are pretty but soft. If you’re mixing metals—brass light, steel bracket—separate with EPDM or nylon washers and add dielectric grease. In coastal air, apply a tiny smear of anti-seize on threads so you can service the gasket later. Overtightening warps plates and cracks glass. Snug, then quarter-turn.
LED Retrofit Notes
Pick bulbs that fit the cage. A15, A19, or Edison-style ST64 work in most ovals; short GU10s work in compact rounds. Aim 2700–3000K for warm, 400–600 lumens for hallways, 800–1,000 for outdoor entries. Avoid super-hot corn LEDs; heat kills gaskets. If the lens is prismatic glass, glare is already tamed—skip extra diffusers.
Safety & Drawbacks
Old fittings are heavy. Mount into solid structure, not drywall alone. Some vintage paint contains lead; wear a mask when sanding. A few military dials used radium—bulkheads typically didn’t, but glow paint can show up nearby. Replace cracked gaskets, nicked wires, and loose cages before use. Not UL/CE unless documented.
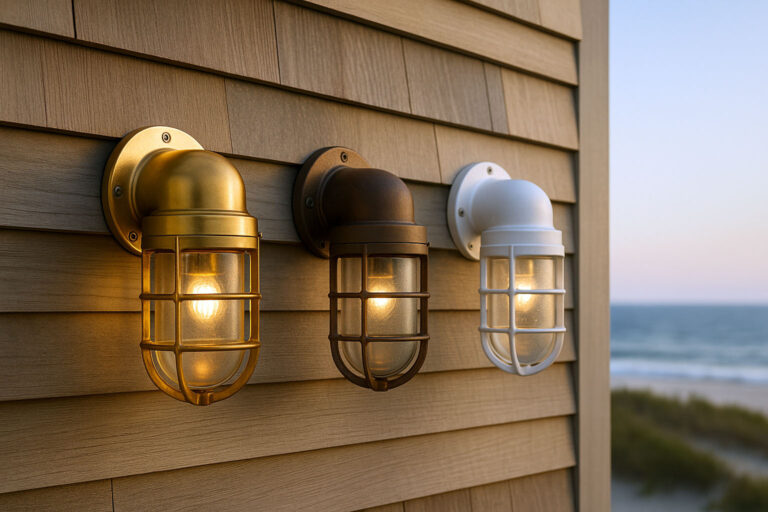
Where to Use & Style Notes
Use small rounds for stair landings, medium ovals for hallways, and large ovals for exterior entries and garages. Brass warms up indoors; aluminum reads industrial outside. Keep centerlines consistent across a wall—it’s the difference between “shipshape” and “why does that one feel off?”
Quick Troubleshooting
Rattle? Add a fiber washer under the cage screws. Fogging? Dry it, redo the gasket, and check the gland. Crooked? Loosen, shim with EPDM, and re-level. Flicker? Replace the lamp holder.
Final Checklist
Before you drill:
- Confirm body size fits the spot.
- Confirm PCD or hole centers.
- Confirm hole diameter and screw type.
- Confirm gasket condition.
- Confirm cable gland and cable OD.
- Take straight-on photos for records.