Passageway vs Companionway Lights: What’s the Difference?
Trying to tell a passageway light from a companionway light? You’re not alone. Shipyards, catalogs, and salvage dealers toss both terms around, and they sound similar. But on board, they solve different problems. Passageways are long, narrow corridors that need safe, even lighting. Companionways are stair/ladder openings between decks that need glare-free, downward light. Different jobs, different fixtures. In this guide, we’ll break down what each one is, where it’s used, and how to pick, wire, and install them without drama. We’ll cover pros, cons, dimensions, mounting heights, and restoration tips so you can buy once and do it right.
Quick definitions (what they are)
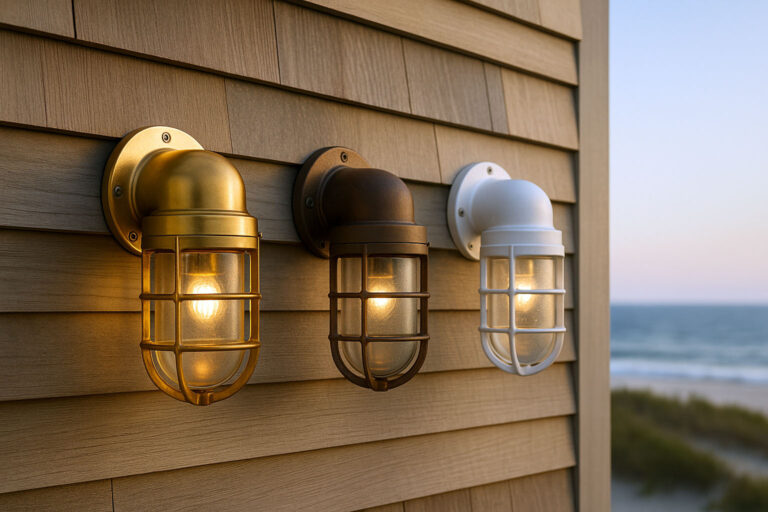
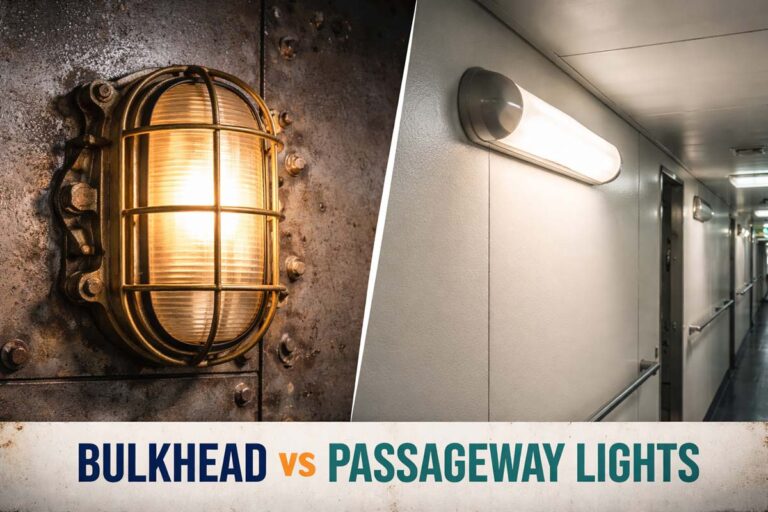
Passageway lights are compact, durable fixtures that live on corridor bulkheads. Think caged bulkhead lights with frosted or prismatic glass, throwing a soft pool across a narrow walkway without snagging clothing or gear. Typical size is 6–12 in (150–300 mm) long, often with an oval backplate and screw-on guard.
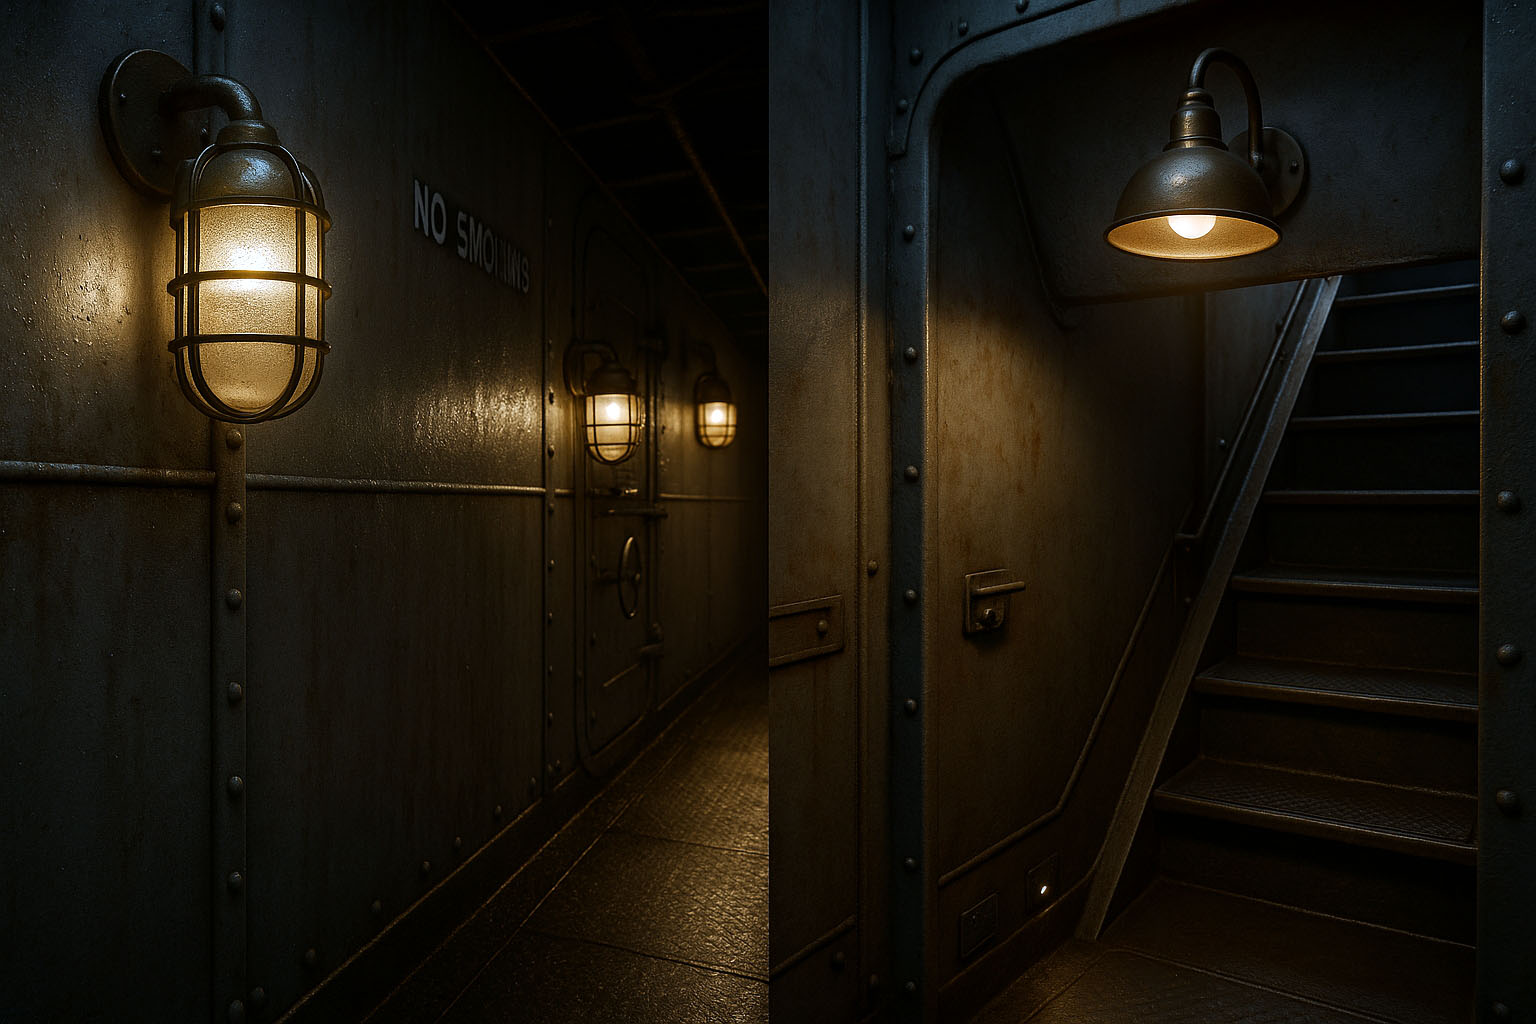
Companionway lights focus on stairs or ladder wells between decks. They aim light down and away from eyes, usually with a hood, visor, or angled reflector. Many are gooseneck or hooded sconces, sometimes with a step light at knee height. The priority is seeing tread edges—not lighting the whole room.
Why ships use them differently (why it matters)
Corridors need even coverage to avoid dark patches that trip people or hide signage. Passageway lights solve that with wide, diffuse beams and tough cages that shrug off elbows and gear. They hug the wall so crew can pass quickly.
Companionways are a different safety risk: glare on stairs. If a bright bulb hits your eyes as you climb, your foot can miss. Companionway fixtures shade the source and push light down the steps. On rough seas, that small detail prevents falls. That’s why you’ll see hoods, louvers, or angled mounts around ladder openings, not just a generic bulkhead light.
Design differences at a glance
- Beam: Passageway = wide, diffuse spill. Companionway = controlled, downward beam.
- Form factor: Passageway = oval/round body with guard; low profile. Companionway = hooded, goose-neck, or louvered; sometimes adjustable.
- Glare control: Passageway = frosted/prismatic lens. Companionway = visor/hood shielding the eye.
- Mounting height: Passageway ~1.5–1.7 m (5–5.5 ft). Companionway often higher, aimed at treads, plus optional step lights at ~300–600 mm (12–24 in).
- Impact risk: Passageway takes hits; chunky cages help. Companionway prioritizes sightlines and clearance over the opening.
Benefits and drawbacks (pros/cons in real use)
Passageway lights – Pros: rugged, simple, inexpensive; easy to space every 2–3 m (6–10 ft); great for hallways, sheds, and exterior walkways at home. Cons: can glare if clear glass; can look “industrial” indoors; broad spill may waste light outdoors.
Companionway lights – Pros: safer stairs thanks to glare control; elegant in homes over steps or entries; better at putting lumens where feet land. Cons: more parts (hoods, arms); can cast shadows if placed wrong; sometimes pricier. Pick by task: long even lighting (passageway) vs. stair-focused visibility (companionway).
How to choose (simple step-by-step)
- Map the space. Corridor? Measure width and length. Stairs? Count risers and note headroom.
- Pick the family. Corridor = passageway light. Stairs/ladder = companionway (hooded) plus optional step lights.
- Size it. Small corridors: 150–200 mm (6–8 in) body. Wider runs: 230–300 mm (9–12 in). For a stair hood, ensure the visor doesn’t protrude into headroom.
- Beam & lens. Frosted or prismatic glass for corridors; opaque hood or louver for stairs.
- Ingress rating. Indoors: IP20–IP44 is fine. Exterior or damp: aim for IP54–IP66.
- Lamp & voltage. Decide 110–120V or 220–240V. Retrofit with E26/E27 LED (2700–3000K for warm brass; 4000K if you want cooler).
- Finish & vibe. Brass/bronze for coastal warmth, stainless for modern, galvanized for industrial.
- Quantity & spacing. Corridors: one every 2–3 m (6–10 ft). Stairs: one upper hooded light + optional one mid-flight if long.
- Budget for rewiring. Salvage fixtures often need new sockets, gaskets, and grounding.
Where they’re mounted (placement that works)
For passageways, center the fixture about 1.6 m (5 ft 3 in) above deck so the beam spreads across the floor without shining straight into faces. If ceilings are low, drop to ~1.5 m (5 ft) and use frosted glass. Space evenly to avoid bright/dark bands.
For companionways, mount above the opening or on the side bulkhead, angled so the light skims the treads. Keep at least 2 m (6 ft 6 in) headroom under any projection. If your run is steep or enclosed, add step lights at 300–450 mm (12–18 in) above tread noses.
Wiring & safety (how to do it right)
Legacy ship lights are tough but not plug-and-play. Replace old cabling with marine-grade or equivalent, add a ground to the body, and fit a modern E26/E27 ceramic or phenolic socket. Choose LED lamps that stay cool and won’t bake gaskets. For outdoor installs, confirm intact rubber/silicone seals and use IP-rated cord grips. If you’re on 220–240V (common in Bangladesh/EU), verify socket ratings and switch gear. On 110–120V systems, match breakers and wire gauge to local code. Remember: these are not certified for new-vessel compliance unless stated; treat them as architectural lights in homes or hospitality.
Finishes & materials (what lasts)
- Solid brass/bronze: corrosion-resistant, polishes well, ages to a warm patina. Great near salt air.
- Stainless (316 if possible): crisp look, excellent outdoors, minimal maintenance.
- Galvanized steel/aluminum: rugged, lighter weight; may show wear faster; good for industrial spaces.
For indoor warmth, unlacquered brass with frosted glass is timeless. For wet areas, pick gaskets you can actually replace.
Restoration & retrofits (step-by-step)
- Inspect. Check threads, guard straightness, lens chips, and any hairline cracks.
- De-wire. Remove old cable and socket. Photograph original routing before you strip it.
- Clean. Degrease, then polish or bead-blast depending on finish goals. Keep maker’s marks intact.
- Gaskets. Replace with new nitrile/silicone rings; cut to length if needed.
- Rewire. Install grounded socket, strain relief, and ring terminals. Keep sharp edges deburred.
- Test. Megger/continuity check, then 2–4 hours burn-in with LED at rated voltage.
- Seal. Lightly grease threads, confirm IP seals seat evenly, and avoid over-torqueing the guard.
Buying checklist & pricing cues (what to look for)
- Lens: original prismatic/frosted glass beats acrylic; no spider cracks.
- Guard: straight, all screws present; stripped threads cost time.
- Backplate: flat to wall; warped plates rock and leak.
- Markings: maker’s plate, navy stamp, or ship name adds value (if documented).
- Completeness: gasket, cage, and junction hardware included.
- Scale: check dimensions in mm/in so it doesn’t dwarf your stair.
- Typical price bands: small passageway bulkheads often budget-friendly; large hooded companionway pieces, especially in bronze, command more due to complexity.
Common mistakes to avoid (drawbacks & fixes)
- Glare bombs on stairs. Fix: use a hooded companionway fixture or add louvers.
- Over-bright corridors. Fix: frosted glass, lower wattage, wider spacing.
- No ground. Fix: add a dedicated earth wire to the body.
- Mixing finishes poorly. Fix: keep metals consistent across a run.
- Ignoring protrusion. Fix: confirm projection ≤100–130 mm (4–5 in) in tight hallways.
Bottom line: Passageway lights spread safe, even light along corridors; companionway lights protect eyes and highlight steps. Pick the type that matches the job, mind your mounting heights, and give any salvage fixture a proper rewire and gasket check. Do that, and your space will look right—and keep people sure-footed—whether you’re fitting out a seaside home or giving an old ship part a second life.