How to Wire Nautical Lights: A Salvage Yard Guide
Last month I pulled a brass bulkhead light off a scrapped cargo ship near our yard. The body was solid. The wiring inside was a crumbling mess. That old cloth insulation turned to dust in my fingers. Every salvaged light I bring in tells the same story. The fixture survives for decades. The wiring never does.
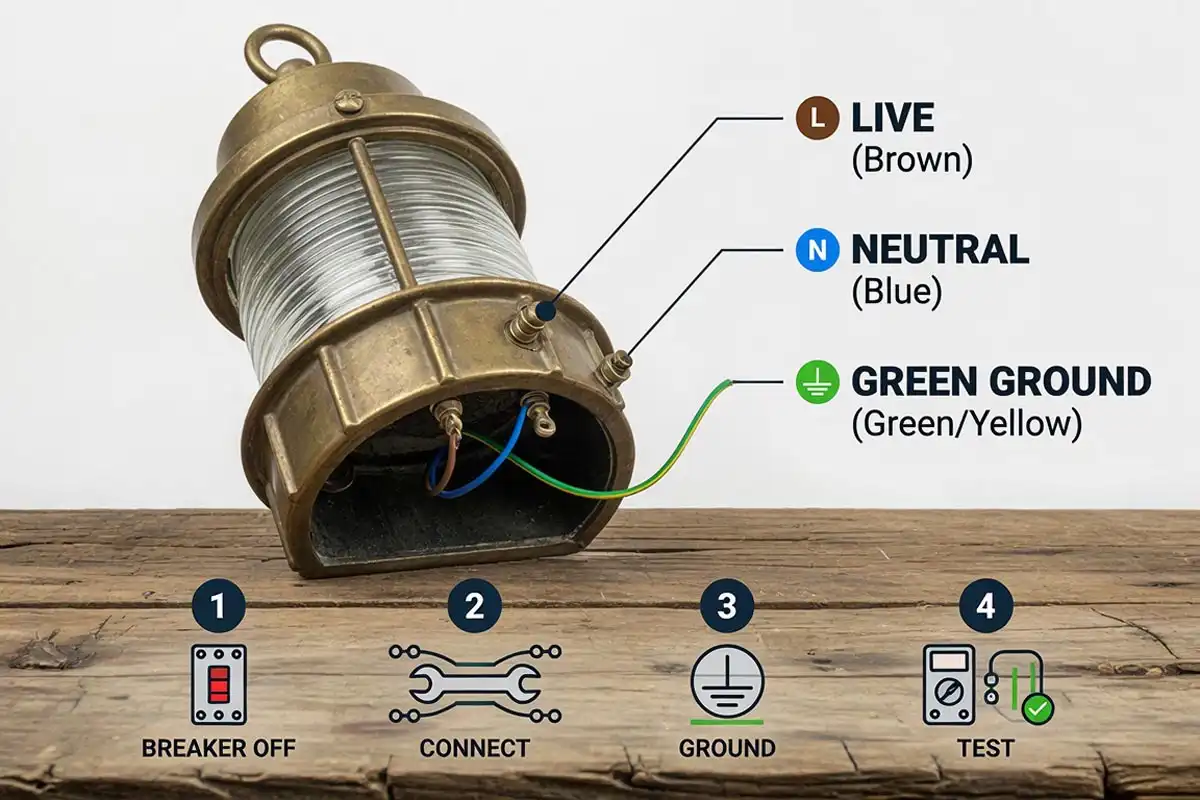
To wire a nautical light, cut power at the breaker, then strip out the old ship wiring completely. Connect the light’s live wire to your home’s hot wire, neutral to neutral, and the ground wire to both the metal body and your house ground. Cap every join with a wire nut and test before you close the fixture.
What You Need Before You Start
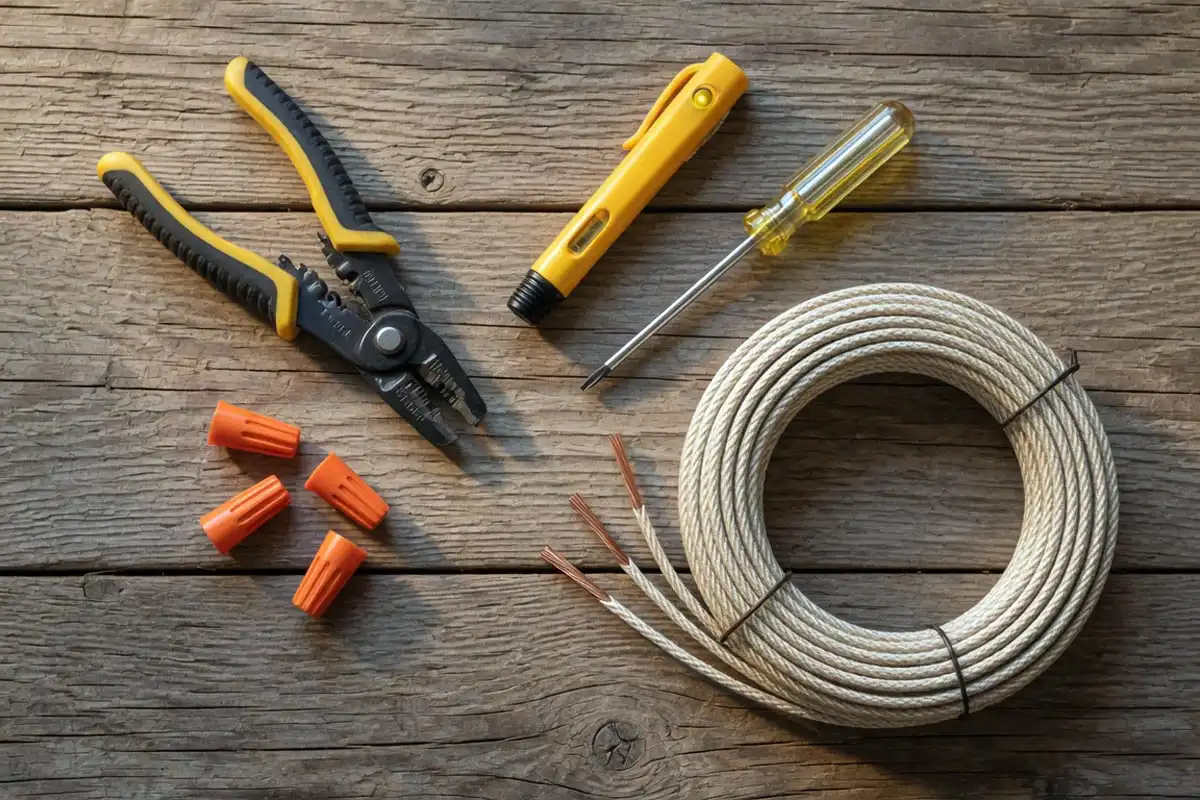
You do not need much. A wire stripper, a screwdriver, wire nuts, and a voltage tester. Keep a fresh lamp socket and some heat resistant wire on hand too.
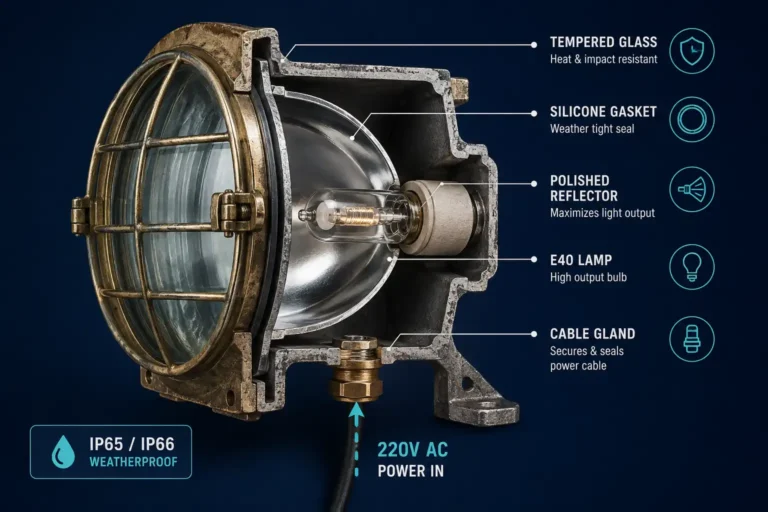
Most salvaged fixtures need a full rewire. The old sockets are usually cracked or corroded. I fit a standard medium base socket rated for LED bulbs. An LED Edison bulb looks right in these lights and runs cool.
Know more: Are Nautical Lights Waterproof? What Really Keeps Water Out
Check the Old Ship Wiring First
Ships do not run on the same power as your house. Many marine lights ran on 24 volt DC systems. Some ran on 110 volt. None of that old wiring belongs in your wall today.
Strip it all out. Pull the old socket, the old cable, and any brittle sleeving. Start clean. If the brass looks rough while you are in there, this is a good moment for cleaning up old ship brass before it goes back together.
How to Wire Nautical Lights Step by Step
Here is the part everyone asks about. Take it slow.
First, turn off the breaker. Test the wires with your voltage tester to be sure the power is dead. Never trust the switch alone.
Second, match your wires. In the US, black is hot, white is neutral, and green or bare copper is ground. In the UK and Europe, brown is live, blue is neutral, and green with yellow is earth.
Third, connect them. Twist the light’s live wire to your home’s hot wire. Cap it with a wire nut. Do the same for neutral.
Fourth, ground the metal body. This step matters most. Brass and aluminum conduct electricity. If a wire ever shorts against the body, the ground gives that current a safe path. Attach the ground wire to the fixture’s ground screw. Then run it to your house ground or the metal box.
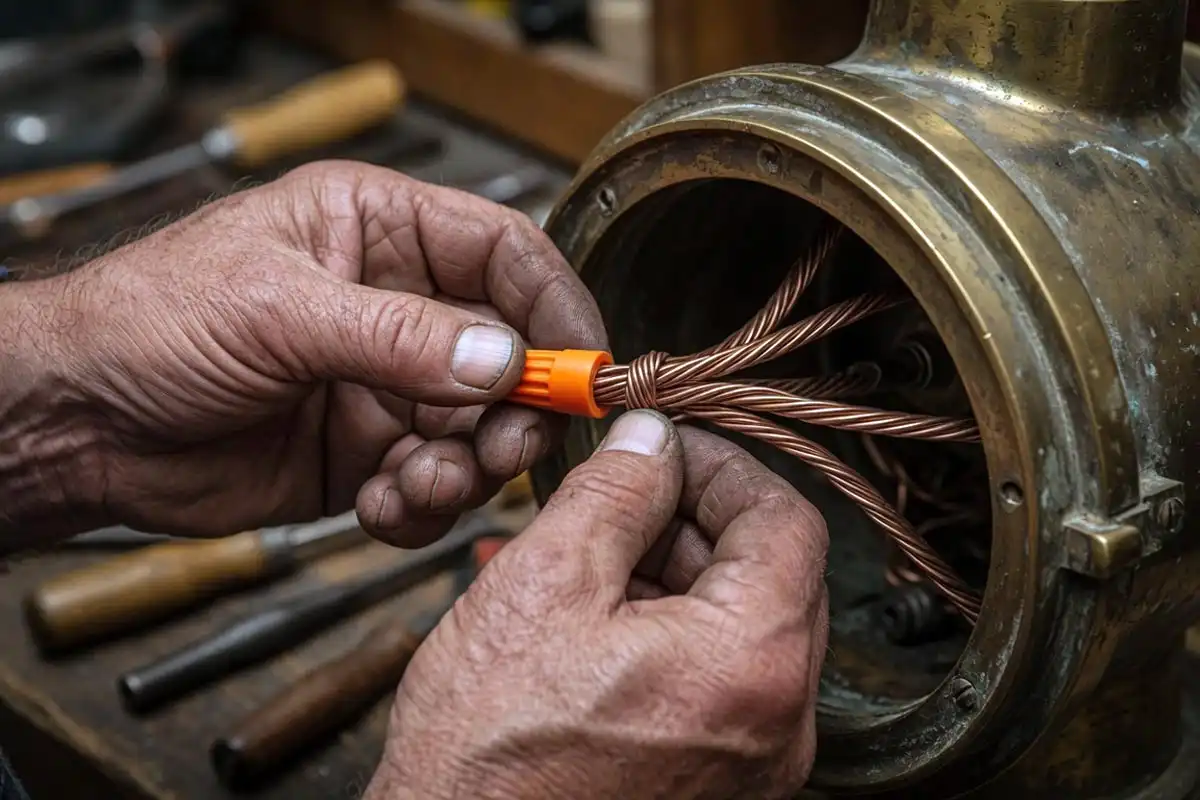
No bare copper should show once you finish. Every join stays inside a wire nut. Tug each connection to check it holds.
Indoor or Outdoor Wiring
A light bound for a porch or garden needs more care. Water and electricity do not mix well. Use a weatherproof junction box behind the fixture. Add a rubber gasket where the light meets the wall.
Old deck lights often have drain holes for this reason. Keep them clear. If yours will face rain, read up on stopping water getting into deck lamps before you mount it. For the mount itself, my notes on fixing a bulkhead fixture to the wall cover the brackets and screws.
Common Wiring Mistakes
The biggest one is skipping the ground. People see a two wire light and assume they can leave the body ungrounded. On a metal fixture, that is a shock risk. Always ground it.
The second mistake is loose connections. A loose wire nut heats up and can start a fire. Twist hard and cap tight.
The third is overloading. Match your bulb wattage to the socket rating. A 60 watt LED equivalent draws little power and keeps the fixture cool. If you want the full picture on the way marine lights function, that guide walks through it.
When to Call an Electrician
I rewire lights all day, but I still respect the mains. If you feel unsure about your home wiring, hire a licensed electrician. Hardwiring into a ceiling box especially deserves a pro. The cost is small next to the risk.
For a simple plug in lamp version, most confident DIYers can manage. Just follow the steps and never rush.
Final Words
A salvaged ship light carries real history. Wire it right and it will light your home for another fifty years. Take your time, ground the body, and test twice. If you would rather start with a piece that is already restored and rewired, browse the authentic salvaged fixtures we keep in stock.
Good luck with your build.