How to Install Bulkhead Lights: A Simple Step by Step Guide
The first bulkhead light I ever mounted was a heavy brass one off a Japanese cargo ship. I held it against the wall, half sure I’d wire it wrong. The hard part turned out to be lifting it, not the wiring. Most of these fixtures follow the same simple pattern. Once you spot it, you can fit almost any of them.
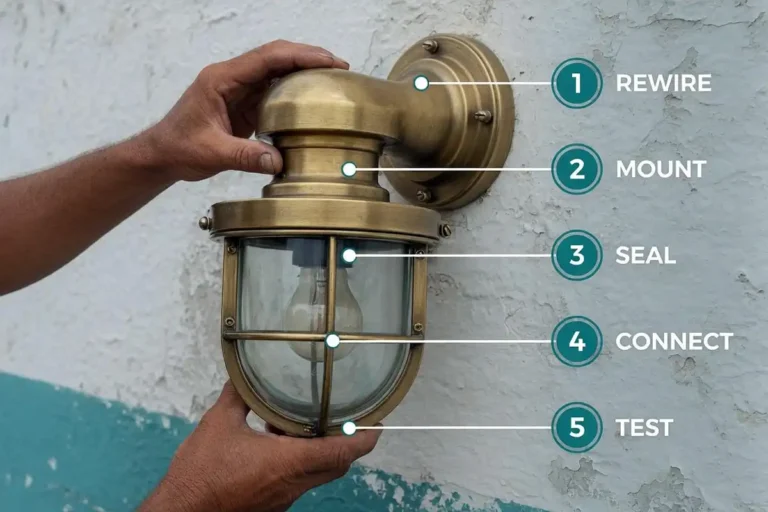
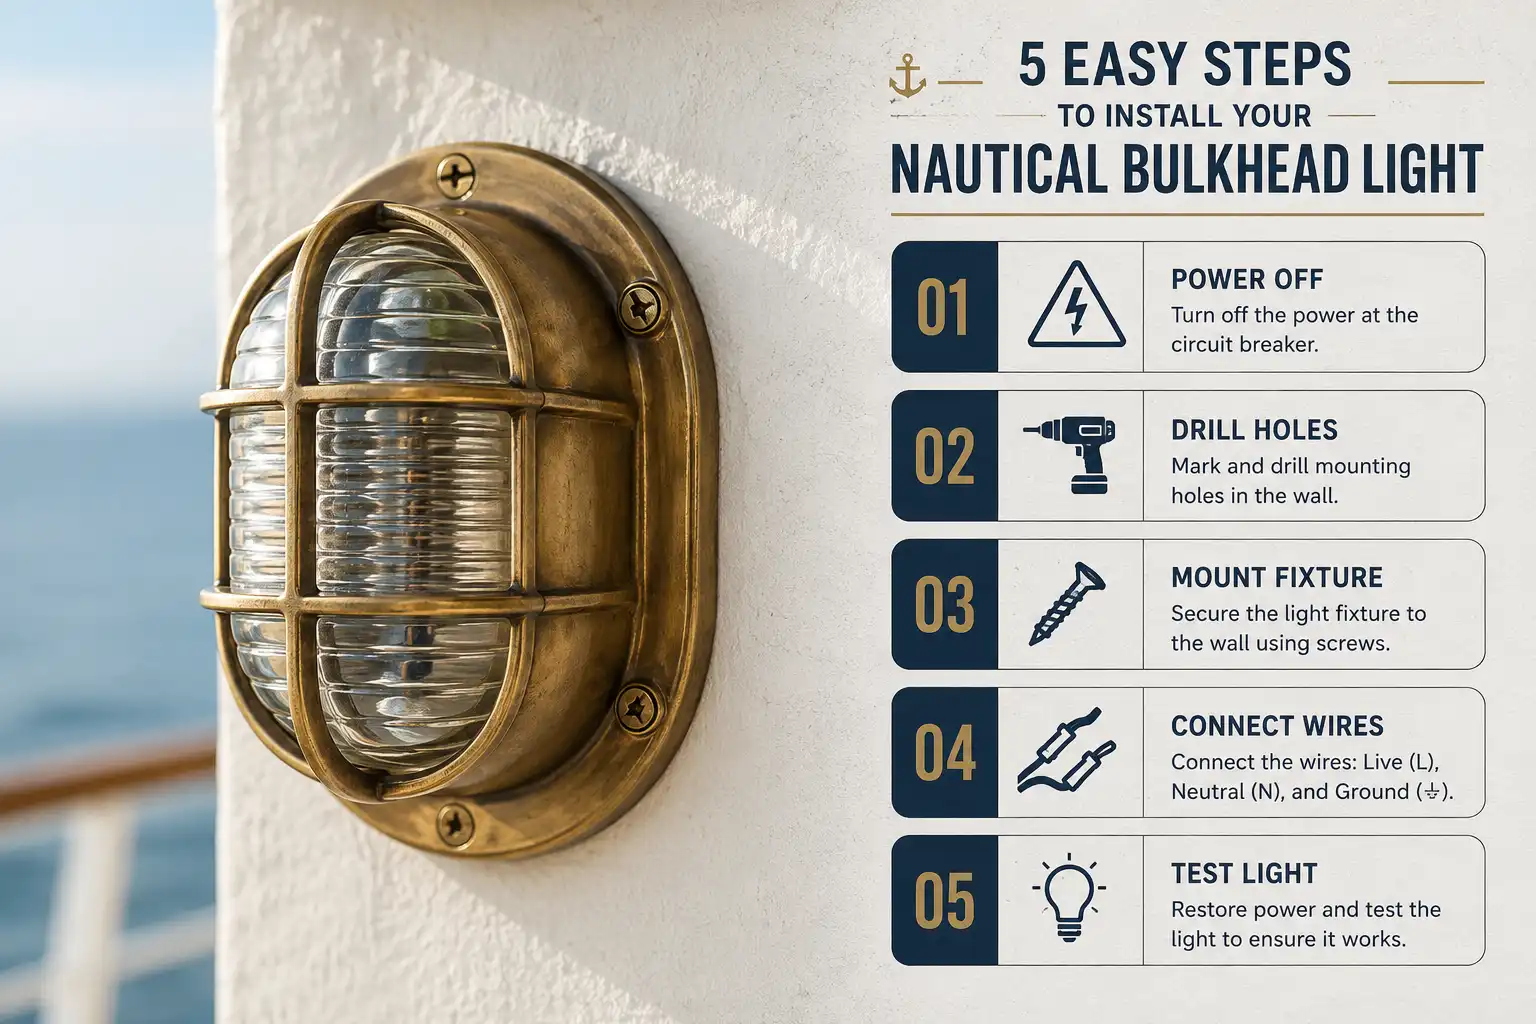
To install a bulkhead light, switch off the power, then mount the metal base to the wall. Connect the three wires: live, neutral, and ground. Screw the fixture down, fit the glass and bulb, and turn the power back on. Most fit in under an hour.
What You Need Before You Start
Grab a few basic tools. You want a drill, a screwdriver, wire strippers, a spirit level, and a voltage tester. Add wall plugs and screws that suit your wall.
One thing about our stock: these lights come off real ships. Many are decades old. Knowing what these fixtures did on board a ship helps you handle them with care. Before you install a salvaged bulkhead light, check the cable inside. Old rubber flex turns brittle. I rewire most of mine with fresh flex and a new bulb holder first.
How to Install Bulkhead Lights Step by Step
1. Cut the power
Turn off the circuit at the breaker or fuse box. Do not just flick the wall switch. Hold your voltage tester to the wires to confirm they are dead. Never skip this.
2. Mark and drill
Hold the base where you want it. Use the level so it sits straight. Mark the screw holes through the back plate, then drill. Line the holes up with the backplate pattern on your fixture so nothing sits crooked. Check the wall can take the weight, since brass and bronze run heavy. If weight worries you, it helps to know whether brass or aluminum suits your space.
3. Mount the base
Push wall plugs into the holes. Feed the mains cable through the entry hole on the base. Then screw the base tight to the wall.
4. Connect the wires
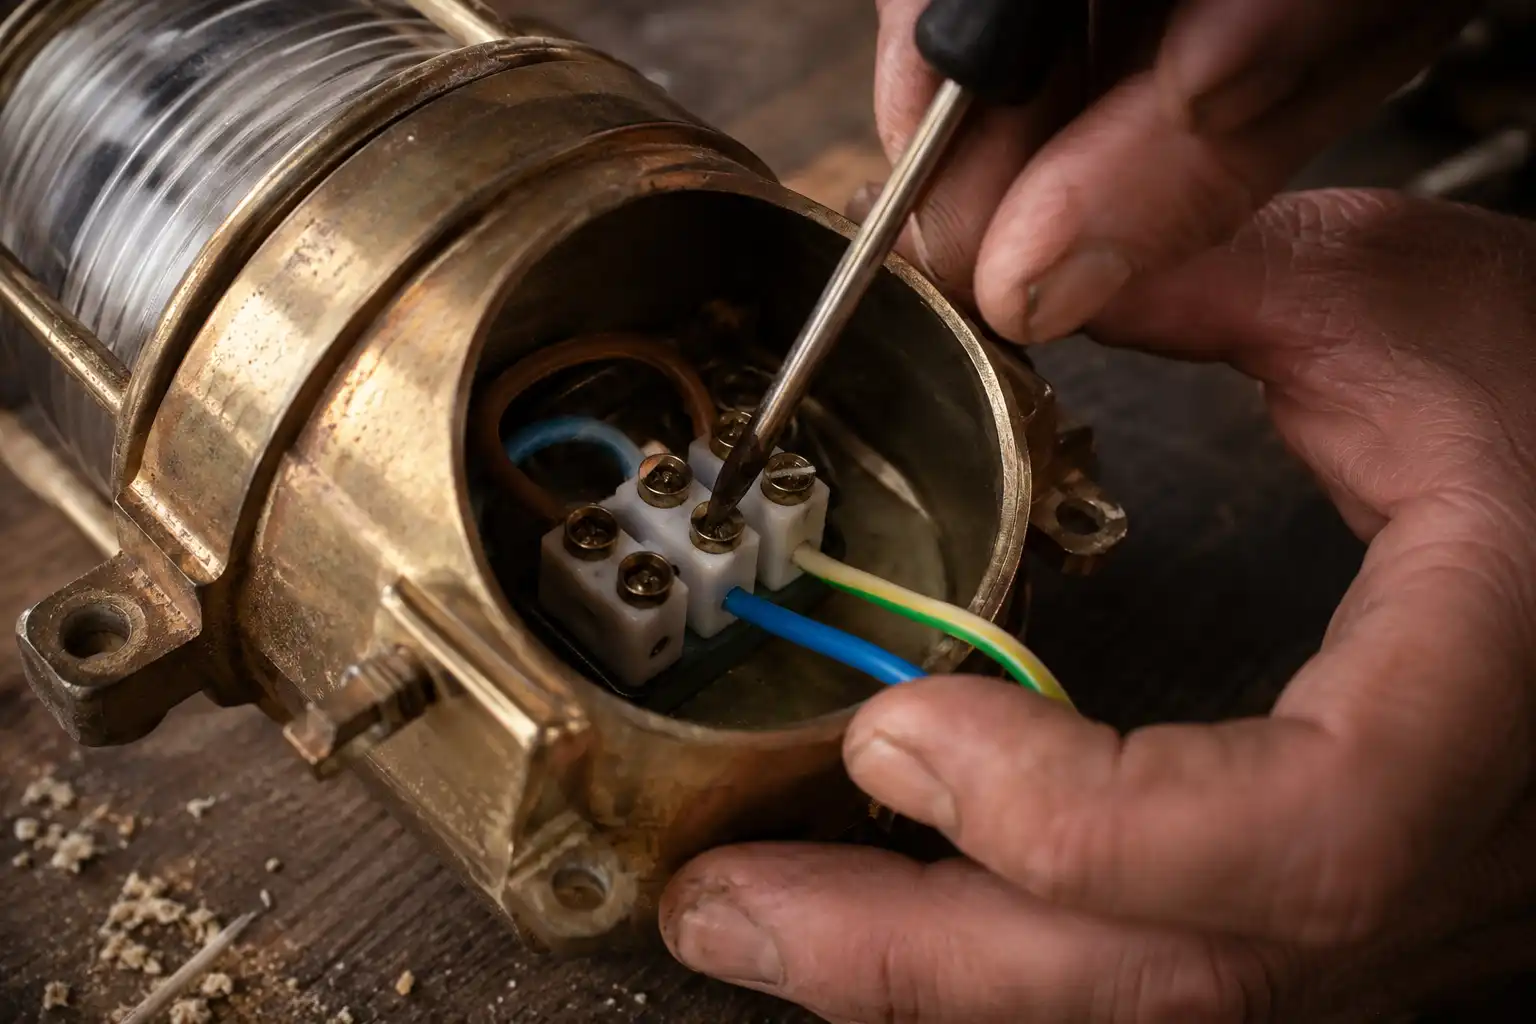
Now wire it up. Match live to live, neutral to neutral, and ground to ground. In the US that is black, white, and green (or bare copper). On older British and European ship lights, it is brown, blue, and green with a yellow stripe. Use the terminal block inside, or wire connectors, and make each joint tight.
5. Fit the glass and test
Tuck the wires in neatly so none get pinched. Screw on the glass cover or cage, then fit your bulb. Restore power and flip the switch. If it lights, you are done.
Indoor or Outdoor? Check the IP Rating
Where the light goes changes what you need. Indoors on a dry wall, almost any bulkhead fixture works fine.
Outdoors or in a bathroom, water matters. An IP rating tells you how sealed a light is. IP44 handles splashes, which suits a covered porch or a bathroom away from the shower. For open outdoor walls or a spot near a shower, IP65 is the safer pick.
Here is the catch with genuine salvage. A light pulled off a ship 40 years ago carries no modern IP certificate. Its gasket may be long gone. For a wet outdoor spot, have an electrician fit a fresh gasket and a proper cable gland first. My notes on keeping water out of an old fixture walk through this.
When Should You Call an Electrician?
Call an electrician when the job needs new mains wiring or a fresh circuit. Many areas also require a licensed person by law for that work. If you are only swapping a fixture on an existing supply and feel confident, you can often do it yourself. When in doubt, pay the pro.
Final Thoughts
A bulkhead light is one of the easiest fixtures to fit. The steps stay the same in brass, bronze, or galvanized steel. Take your time, respect the power, and mount it level.
These lights lasted decades at sea. Fitted well, yours will outlast most things in the house. A quick wipe now and then, plus my tips on bringing the shine back to aged brass, keeps it looking sharp.