How to Fix Water Inside a Deck Light (Step by Step)
Last monsoon I pulled a brass deck light off my own workshop wall. Roughly an inch of water sat in the bottom of the housing. The bulb still lit up. The gasket was finished. That fixture came off a bulk carrier. It survived thirty years of salt spray at sea, then failed on a quiet wall in Chattogram. The reason was simple. Someone, me, reused a hardened rubber seal instead of fitting a new one.
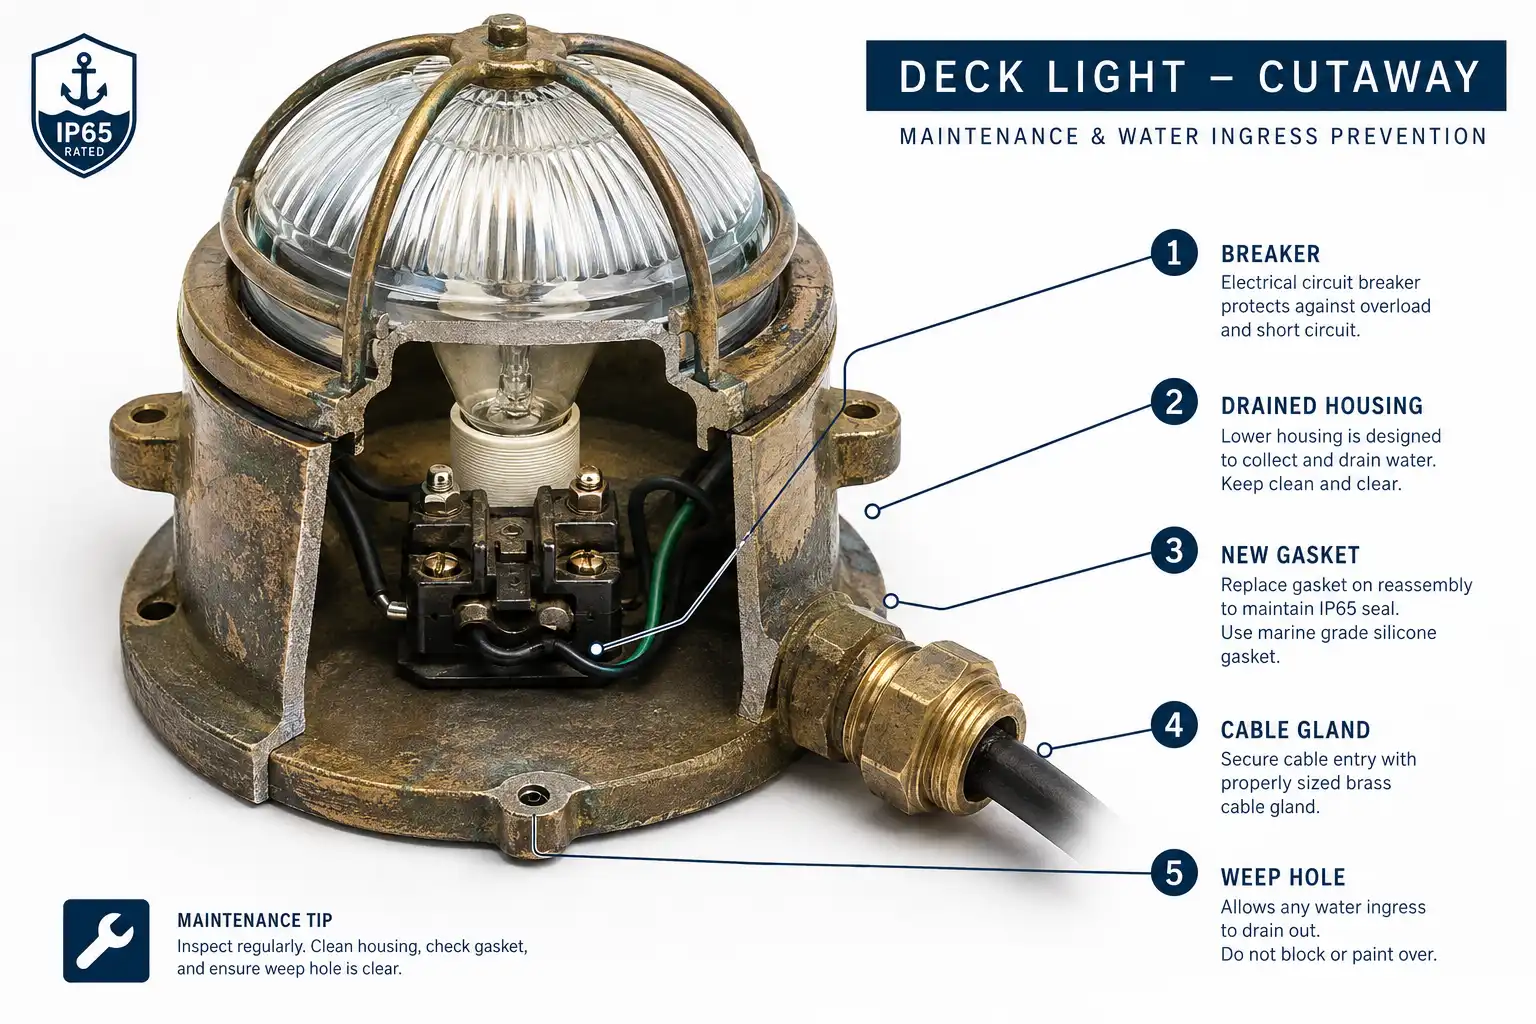
Cut the power at the breaker, open the fixture, and drain the standing water. Dry every surface, fit a fresh gasket, reseal the cable gland, and clear the drain hole. Corroded sockets and wire get replaced, not dried.
What Causes Water Inside a Deck Light
Two different problems look identical from the outside.
Light fog on the glass is usually condensation. Warm air inside the housing cools overnight, and moisture drops onto the cold lens. LED bulbs make this more obvious, because they run cooler than the old incandescent lamps. That fog normally clears within an hour of the light switching on.
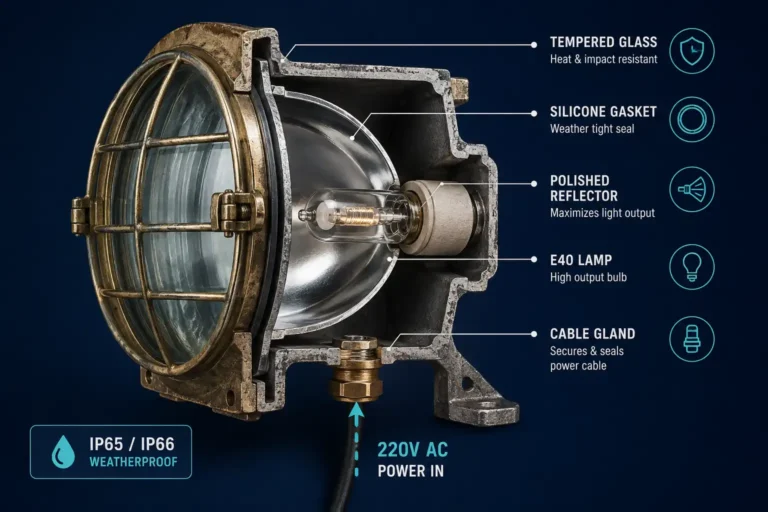
Standing water is a different story. Water is entering faster than the housing can shed it. Usual entry points are a flattened gasket, a cracked lens, a loose cable gland, or a plugged drain hole. For the full diagnostic order, read my longer piece on tracking down where moisture gets into vintage deck lamps.
Water also travels along the cable. Stranded copper wicks moisture between individual strands by capillary action. So a split in the cable jacket two feet above the light can drain straight into it.
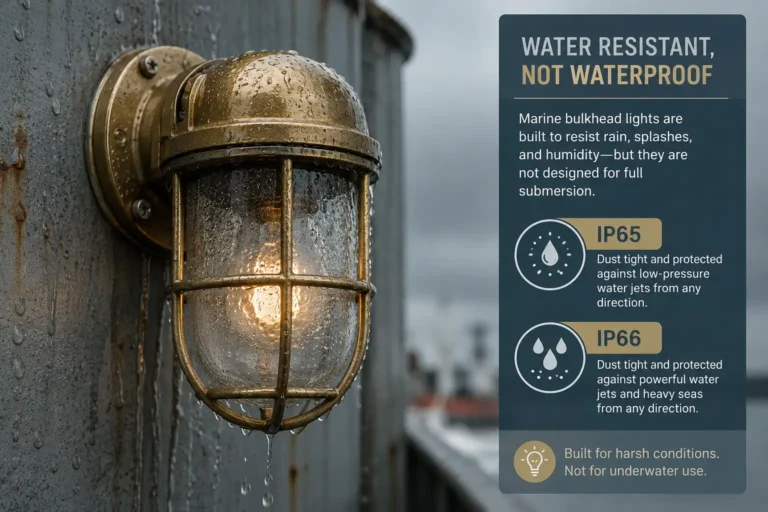
Neither problem means the fixture is junk. It helps to know how waterproof these old marine fittings actually are before you judge yours.
What You Need
- Screwdriver set and a non-contact voltage tester
- Replacement gasket in silicone or EPDM
- Isopropyl alcohol, lint free cloth, small brush
- Marine grade silicone sealant
- Dielectric grease
- Fine brass brush for tarnished contacts
Step by Step Repair
1. Kill the power. Switch off the breaker, not just the wall switch. Confirm with a voltage tester before touching anything. Outdoor circuits need GFCI protection.
2. Drain and look. Open the lens ring or take the fixture off the wall. Tip the water out. Note where the waterline sat, because that tells you how long it has been collecting.
3. Dry it out. Wipe the housing, glass, and lamp holder. Clean the contacts with isopropyl alcohol. Leave the fixture open in warm moving air for a full day. Never point a heat gun or flame at a sealed housing.
4. Judge the corrosion honestly. Drying does not reverse corrosion. White powder on aluminum, or green crust on brass terminals, means the metal is already eaten. Replace the lamp holder, and cut the cable back to clean bright copper. My guide on rewiring an old marine fixture safely covers the terminations.
5. Fit a new gasket. Peel the old seal off completely. Silicone stays flexible from roughly minus 50 to 230 degrees Celsius. EPDM costs less and resists UV and ozone for decades. Seat the gasket dry in its groove, and never stretch it to fit.

6. Reseal the cable entry. Loosen the cable gland and check the rubber insert matches your cable diameter. An oversized gland never compresses properly. Retighten it firm by hand, add dielectric grease to the terminal block, and leave a drip loop in the cable below the gland.
7. Clear the drain hole. Most marine housings have a small weep hole at the lowest point. Poke it clear with a wire. A blocked weep hole turns a self draining fixture into a bucket.
8. Reassemble and test. Tighten the lens ring evenly, working opposite sides like wheel nuts. Restore power, then watch the light through the next few wet days.
Sealing Mistakes That Trap Water
The worst one is running silicone all the way around the back of the fixture. Water still works its way behind the mounting plate. Then it has no exit.
Seal the top and both sides where the light meets the wall. Leave the bottom edge open. Trapped water needs somewhere to go.
Do not pack the housing with sealant either. These fittings were built to breathe and drain. Understanding what deck lights actually did on a working ship makes that design logic obvious.
When to Replace Instead of Repair
Replace the fixture if the housing is cracked, the glass is chipped at the sealing face, or the lens ring threads are stripped. Sealant will not save a damaged sealing surface.
Deeply pitted aluminum is also done. Brass and bronze forgive far more, which is one reason I keep so many reclaimed deck lights from the breaking yards in stock. Once the seal is sorted, a little work bringing the tarnished brass back finishes the job.
Rating helps too. IP66 under IEC 60529 covers powerful water jets. IP67 covers brief immersion. Ground level fittings that sit in puddles want IP67.
Final Thoughts
Water inside a deck light is usually a cheap gasket problem, not a dead fixture. Fix the seal, clear the drain, and the light goes back to doing exactly what it did at sea.
Good luck with yours.