
How to Install Pendant Lights: Height, Wiring, and Hardware
Last spring I crated a pair of brass pendants pulled off a Japanese bulk carrier at the Sitakunda yard. The buyer in Oregon sent photos two weeks later. Both lights were up. One hung four inches lower than the other. He had measured down from his ceiling. His ceiling was not level. Almost none are. That habit cost him a Saturday on the ladder.
To install pendant lights, shut off the breaker and confirm the ceiling box carries the fixture weight. Screw the crossbar to the box, set your drop length, then join hot to hot, neutral to neutral, and ground to ground. Over a kitchen island, the bottom of the shade sits 30 to 36 inches above the counter.
What to Gather First
Lay everything out before you climb. Nothing burns an afternoon faster than a missing collar nut.
- Non-contact voltage tester
- Wire strippers, pliers, screwdrivers
- Wire connectors sized to your conductors
- Tape measure, pencil, level
- Stepladder and a helper
Most pendants ship with a mounting strap (the crossbar), a threaded nipple, a canopy, and a collar nut. Salvage pieces rarely include any, so I send hardware with every fixture. Still choosing the light itself? My notes on picking industrial pendants that suit the room cover proportion and shade shape.
How to Install Pendant Lights Step by Step
These five steps cover how to install pendant lights on a standard ceiling box.
1. Kill the power and prove it is dead
Switch off the breaker, not just the wall switch. Then hold your voltage tester against every wire in the box. Some boxes carry a second circuit passing through.
2. Check what the box holds
Under the National Electrical Code, a ceiling box used for lighting supports a luminaire of at least 50 pounds. Anything heavier hangs off the framing on its own support, unless the box carries a listing for that load. Boxes marked for paddle fans handle up to 70 pounds.
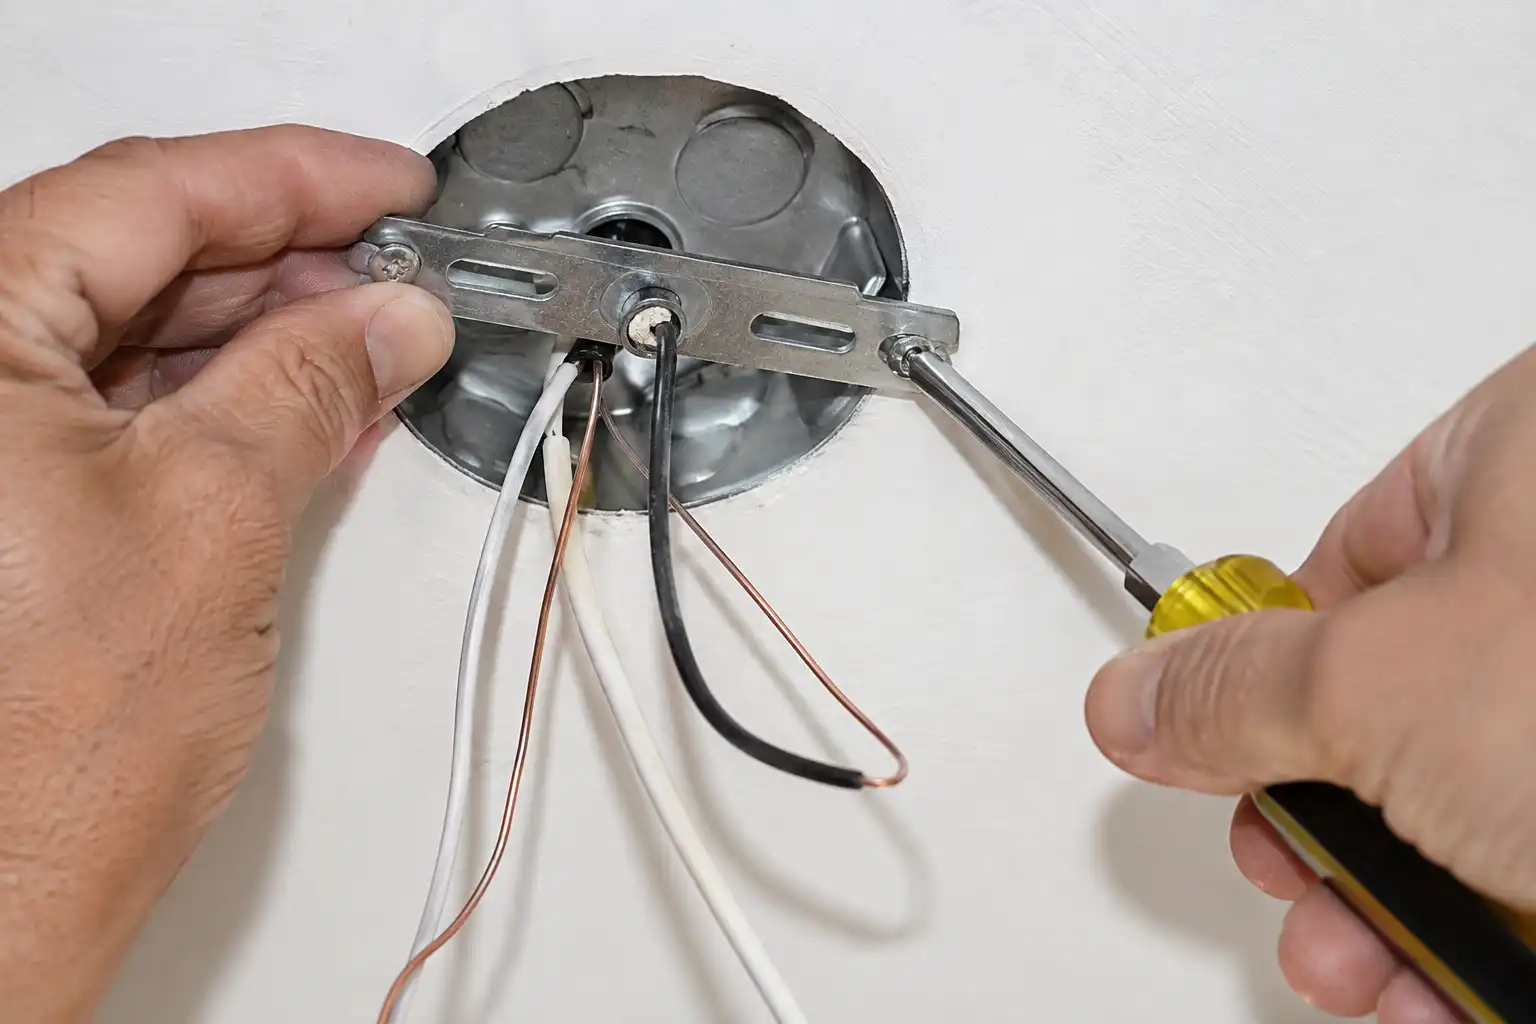
Salvaged marine pendants run heavy. A cast bronze body with a thick glass globe hits 15 pounds easily. A plastic old-work box clipped into drywall carries none of that safely. Swap it for a metal fan-rated box screwed to a joist or bar hanger.
3. Set the drop length
Measure up from the finished floor, never down from the ceiling. Mark your target on the wall, then match the fixture to it.
Rod pendants use stems you add or remove. Cord pendants shorten inside the canopy: feed the extra cord up through the collar and lock it in the cord grip. Leave the cord uncut unless the instructions say otherwise. Sloped ceilings need an angled adapter so the canopy sits flush.
4. Make the connections
Fasten the crossbar to the box first, threaded nipple centered. Strip about three quarters of an inch of insulation. Join black to black and white to white. Then tie the fixture ground and the box ground screw to the bare or green house wire. Every metal pendant needs that ground path.
Tug each connector, then fold the wires into the box in a loose coil so the canopy seats flat. My walkthrough on wiring an old marine fixture safely covers the wire colors on foreign-built ships, which do not always match US practice.
5. Seat the canopy and test
Lift the canopy over the nipple and thread the collar nut by hand until it bites. Snug it a quarter turn with pliers, no more. Restore power, switch on, then sight the fixture against a door frame and level the pair.
Getting Height and Spacing Right

Over a kitchen island, the bottom of the shade belongs 30 to 36 inches above the countertop. I aim for 34 inches. It clears sightlines and still throws usable task light.
Space multiple pendants 24 to 30 inches apart, center to center. Keep the outer fixture at least 6 inches in from the island end. For ceilings above 8 feet, add roughly 3 inches of height per extra foot. Over a stair or entry, leave 7 feet of headroom underneath. Mark the spots in painter’s tape before you drill, especially when building a kitchen around authentic ship fixtures.
Extra Steps for a Salvaged Pendant
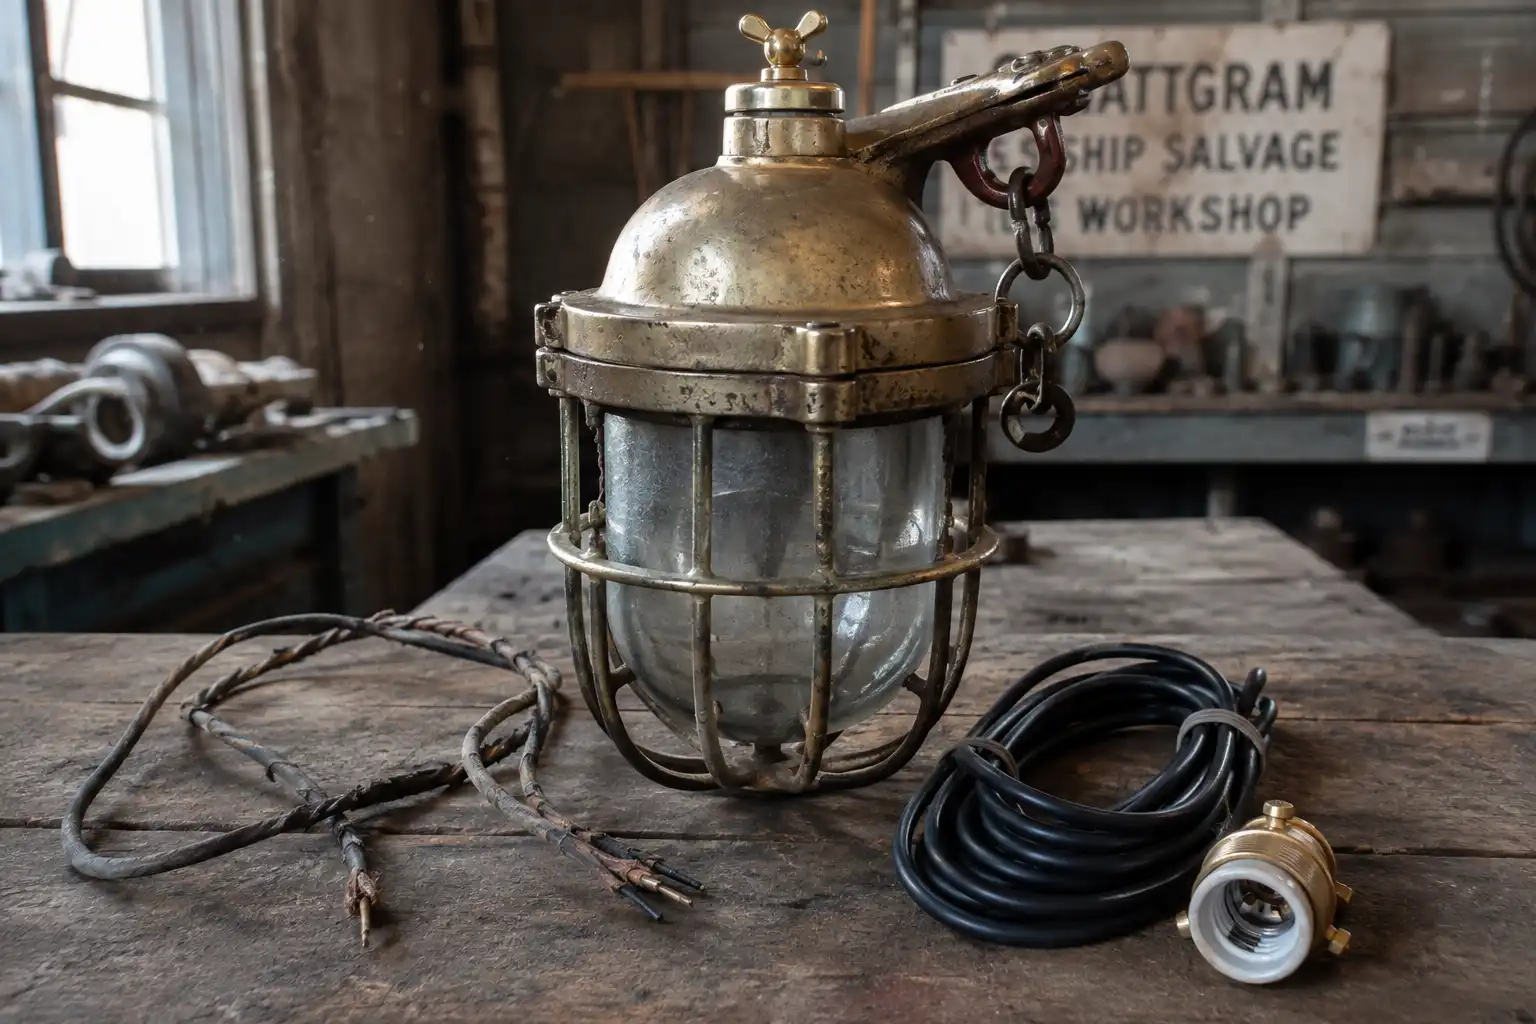
Old shipboard fixtures need work before they hang. Rubber-insulated leads from the 1970s crumble the moment you flex them. Replace the internal wiring with heat-rated conductors and fit a fresh UL listed socket. Check the bulb rating stamped inside, since a sealed brass shade traps heat around an oversized lamp.
Fit a warm LED and confirm your dimmer is rated for LED loads. Most reclaimed ship pendants I ship from Chattogram take a standard medium base after rewiring. The same prep applies when mounting reclaimed marine fixtures at home.
Where a Pendant Cannot Hang
Code keeps suspended fixtures away from water. No part of a pendant or cord-hung light belongs within 3 feet horizontally of a bathtub rim or shower threshold. That zone also runs 8 feet up. Above the tub itself and under that line, a fixture needs a damp location marking, or a wet marking where shower spray reaches it.
Outdoors, a covered porch needs a damp rating and open exposure needs a wet rating. Gaskets harden with age, so check what old marine fixtures keep out before one goes under an eave.
Final Thoughts
Pendant installs go wrong in slow, quiet ways. A box that holds today and sags in a year. A drop measured off a ceiling that dips half an inch. Spend ten extra minutes on the box rating and the height marks.
If the box or the old wiring gives you doubt, hand that part to a licensed electrician. Enjoy the light.